Managing Customers
This page covers the day-to-day actions you take on contacts: creating them, editing their details, adding tags and notes, and blocking, deactivating, or deleting them.
Creating a customer
Select + Add Customer from the Customers list. The create form needs only a name plus either an email or a phone number.
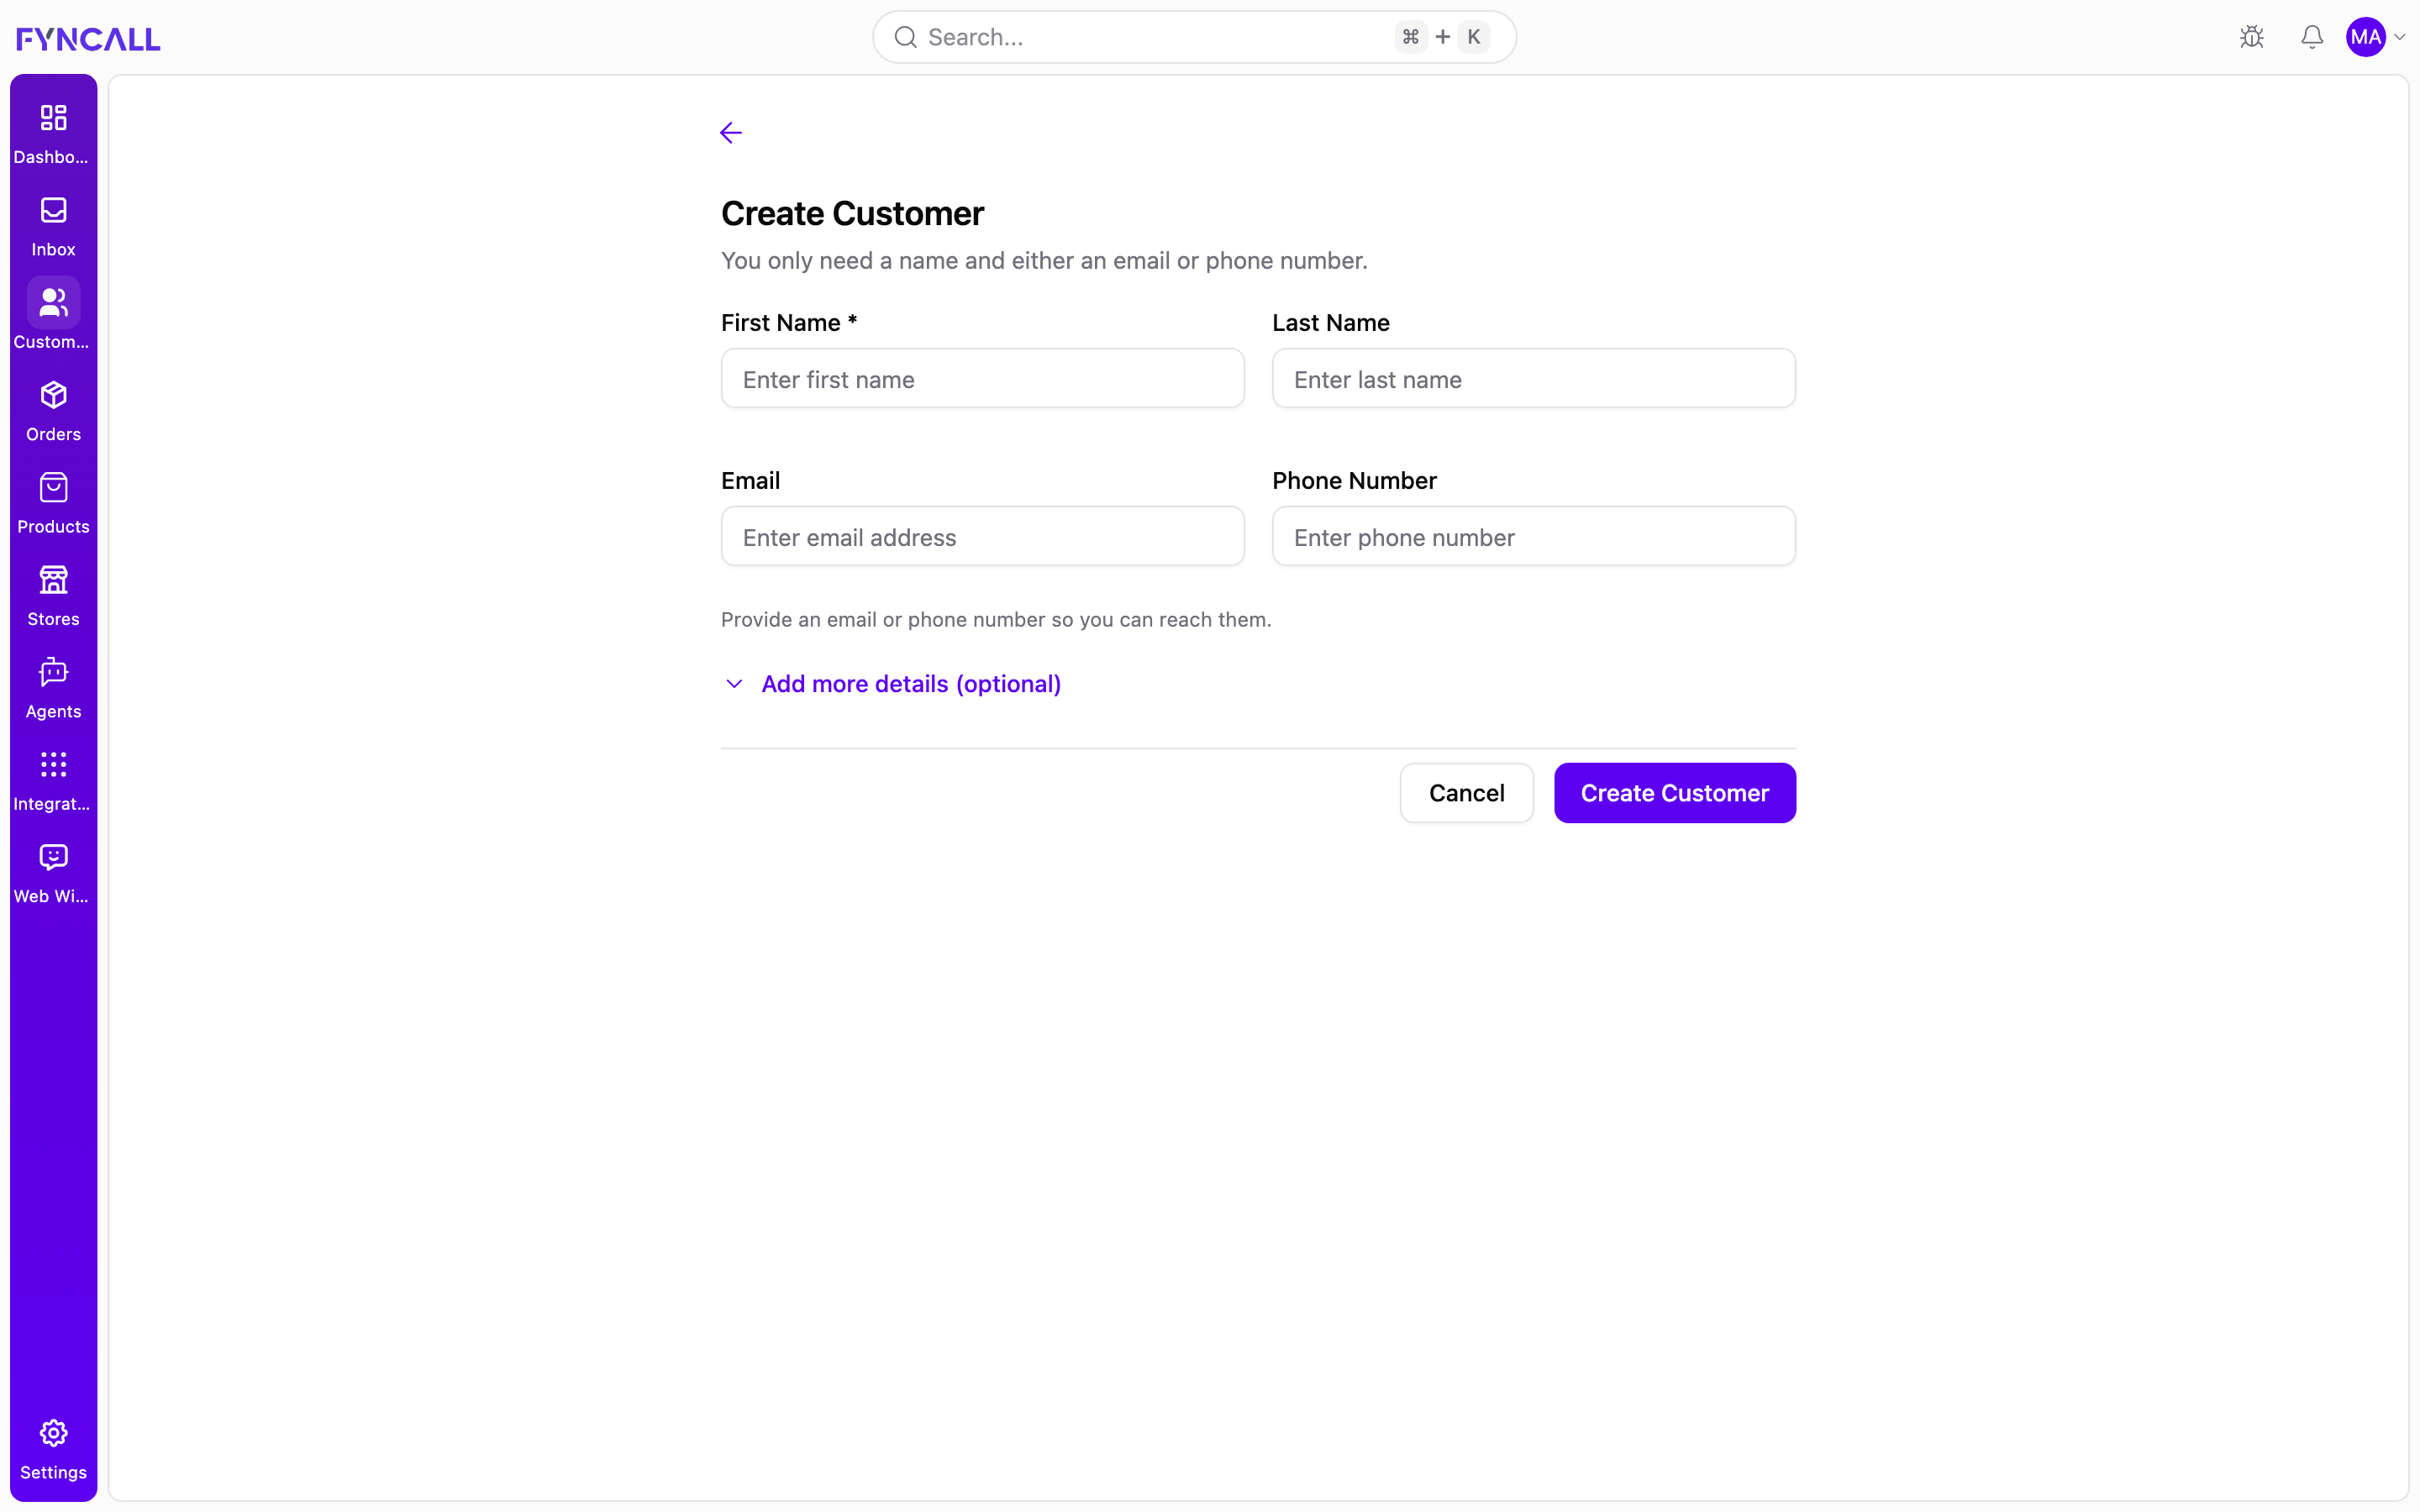
Quick steps:
- On the Customers list, select + Add Customer.
- Enter the First Name (required) and, optionally, the Last Name.
- Enter an Email, a Phone Number, or both — at least one is required.
- (Optional) Select Add more details (optional) to add a company, address, tags, and an internal note.
- Select Create Customer to save.
Required fields
| Field | Required | Notes |
|---|---|---|
| First Name | Yes | Up to 50 characters |
| Last Name | No | Up to 50 characters |
| Required if no phone | Valid email, up to 120 characters | |
| Phone Number | Required if no email | E.164 format, e.g. +14165551234 |
You must provide at least one of email or phone number so you have a way to reach the contact. If both are empty, the form shows "Either email or phone number is required."
Phone numbers must be in E.164 format — a +, the country code, then the number with no spaces or dashes (for example +14165551234). If the format is wrong, the form prompts you to correct it.
Optional details
Select Add more details (optional) to expand additional fields:
| Field | Notes |
|---|---|
| Company | Up to 255 characters |
| Address Line 1 | Street address |
| Address Line 2 | Apartment, suite, etc. (up to 255 characters) |
| City | |
| Country | |
| Postal Code | Up to 20 characters |
| Tags | Type a tag and press Enter (or Add); remove with the X on each tag |
| Internal note | A note for your team — visible to admins and agents, not to the contact |
Select Create Customer to save (or Add contact when creating from the side panel). Select Cancel to discard.
If you have a Shopify store connected, new contacts you create are automatically pushed to Shopify, and the response confirms whether the sync succeeded.
Editing a customer
From a customer profile, open the ⋮ (more) menu and choose Edit. The edit panel lets you update:
- First Name, Last Name, Email, Phone Number, Company
- Tags — entered as a comma-separated list
- Internal note (Shopify note)
The full edit form also exposes Address (address lines, city, province, postal code, country, country code), Preferences (language as an ISO 639-1 code, timezone as an IANA identifier, currency as an ISO 4217 code), and Status & Settings toggles:
| Toggle | Effect |
|---|---|
| Active Status | Whether the customer can access their account |
| Blocked | Prevent the customer from making purchases / being messaged |
| Tax Exempt | Mark the customer as exempt from taxes |
Select Save Changes to apply. When a contact is linked to Shopify, only the fields you changed are synced back, so existing Shopify data is preserved.
Tags
Tags let you label and segment contacts (for example, VIP, wholesale, newsletter).
On the profile (Overview tab):
- In the Preferences and Settings section, select + Add next to Tags.
- Type the tag into the Enter tag… box.
- Press Enter or select Add. Press Escape to cancel.
- To remove a tag, select the X on the tag badge.
Duplicate tags are rejected with a "Tag already exists" message. You can also manage tags in bulk through the comma-separated Tags field in the edit form.
Notes
Notes are internal, team-only annotations attached to a contact — the customer never sees them. They appear in the Notes section of the profile's Overview tab.
| Action | How |
|---|---|
| Add | Type into the Add a note… box and select Add Note |
| Edit | Hover a note and select the pencil icon, change the text, and Save |
| Pin | Select the pin icon to keep important notes at the top (pinned notes are highlighted) |
| Delete | Select the trash icon and confirm in the dialog |
Blocking, deactivating, and deleting
These actions are available from the ⋮ (more) menu on a customer profile.
Block / unblock
Blocking a contact stops you from accepting their messages. A blocked contact shows a red Blocked badge on their profile and in the list.
To block or unblock a contact:
- Open the customer profile.
- Open the ⋮ (more) menu and choose Edit.
- Toggle the Blocked setting on (block) or off (unblock).
- Select Save Changes.
Deactivate / activate
Deactivating sets a contact to inactive (shown by an Inactive badge) without deleting any history.
To deactivate or activate a contact:
- Open the customer profile.
- Open the ⋮ (more) menu.
- Select Deactivate (you'll see "Customer deactivated successfully") or, for an inactive contact, Activate ("Customer activated successfully").
You can also use the Active Status toggle in the edit form.
Delete
Deleting removes a contact permanently from Fyncall and from the connected Shopify store.
To delete a contact:
- Make sure the contact is inactive (deactivate it first if needed).
- Open the ⋮ (more) menu and select Delete.
- Review the confirmation dialog.
- Select Delete Permanently to confirm.
A customer must be inactive before it can be deleted. If you try to delete an active customer, the dialog shows "Cannot delete active customer — This customer must be deactivated before deletion." Select Deactivate & Delete to deactivate and remove the contact in one step.
When deleting an inactive customer, the confirmation dialog reminds you that:
- The customer is removed from the local database
- The customer record is also deleted from Shopify
- The action cannot be undone
Select Delete Permanently to confirm.
Related pages
- Customers Overview — the list, search, filters, and KPIs
- Customer Profiles — the detail page for a single contact