Adding Products
There are two ways to add products to your catalog: create one product at a time with the full product form, or import many at once with a bulk upload file. Both start from the Add Product button on the Products page, and both require the Manage products permission.
If your store is connected to Shopify, most products will sync in automatically. Use the manual options below for products you sell outside Shopify, or to add a product quickly without leaving Fyncall.
Creating a single product
Choosing Single Product opens the create-product form.
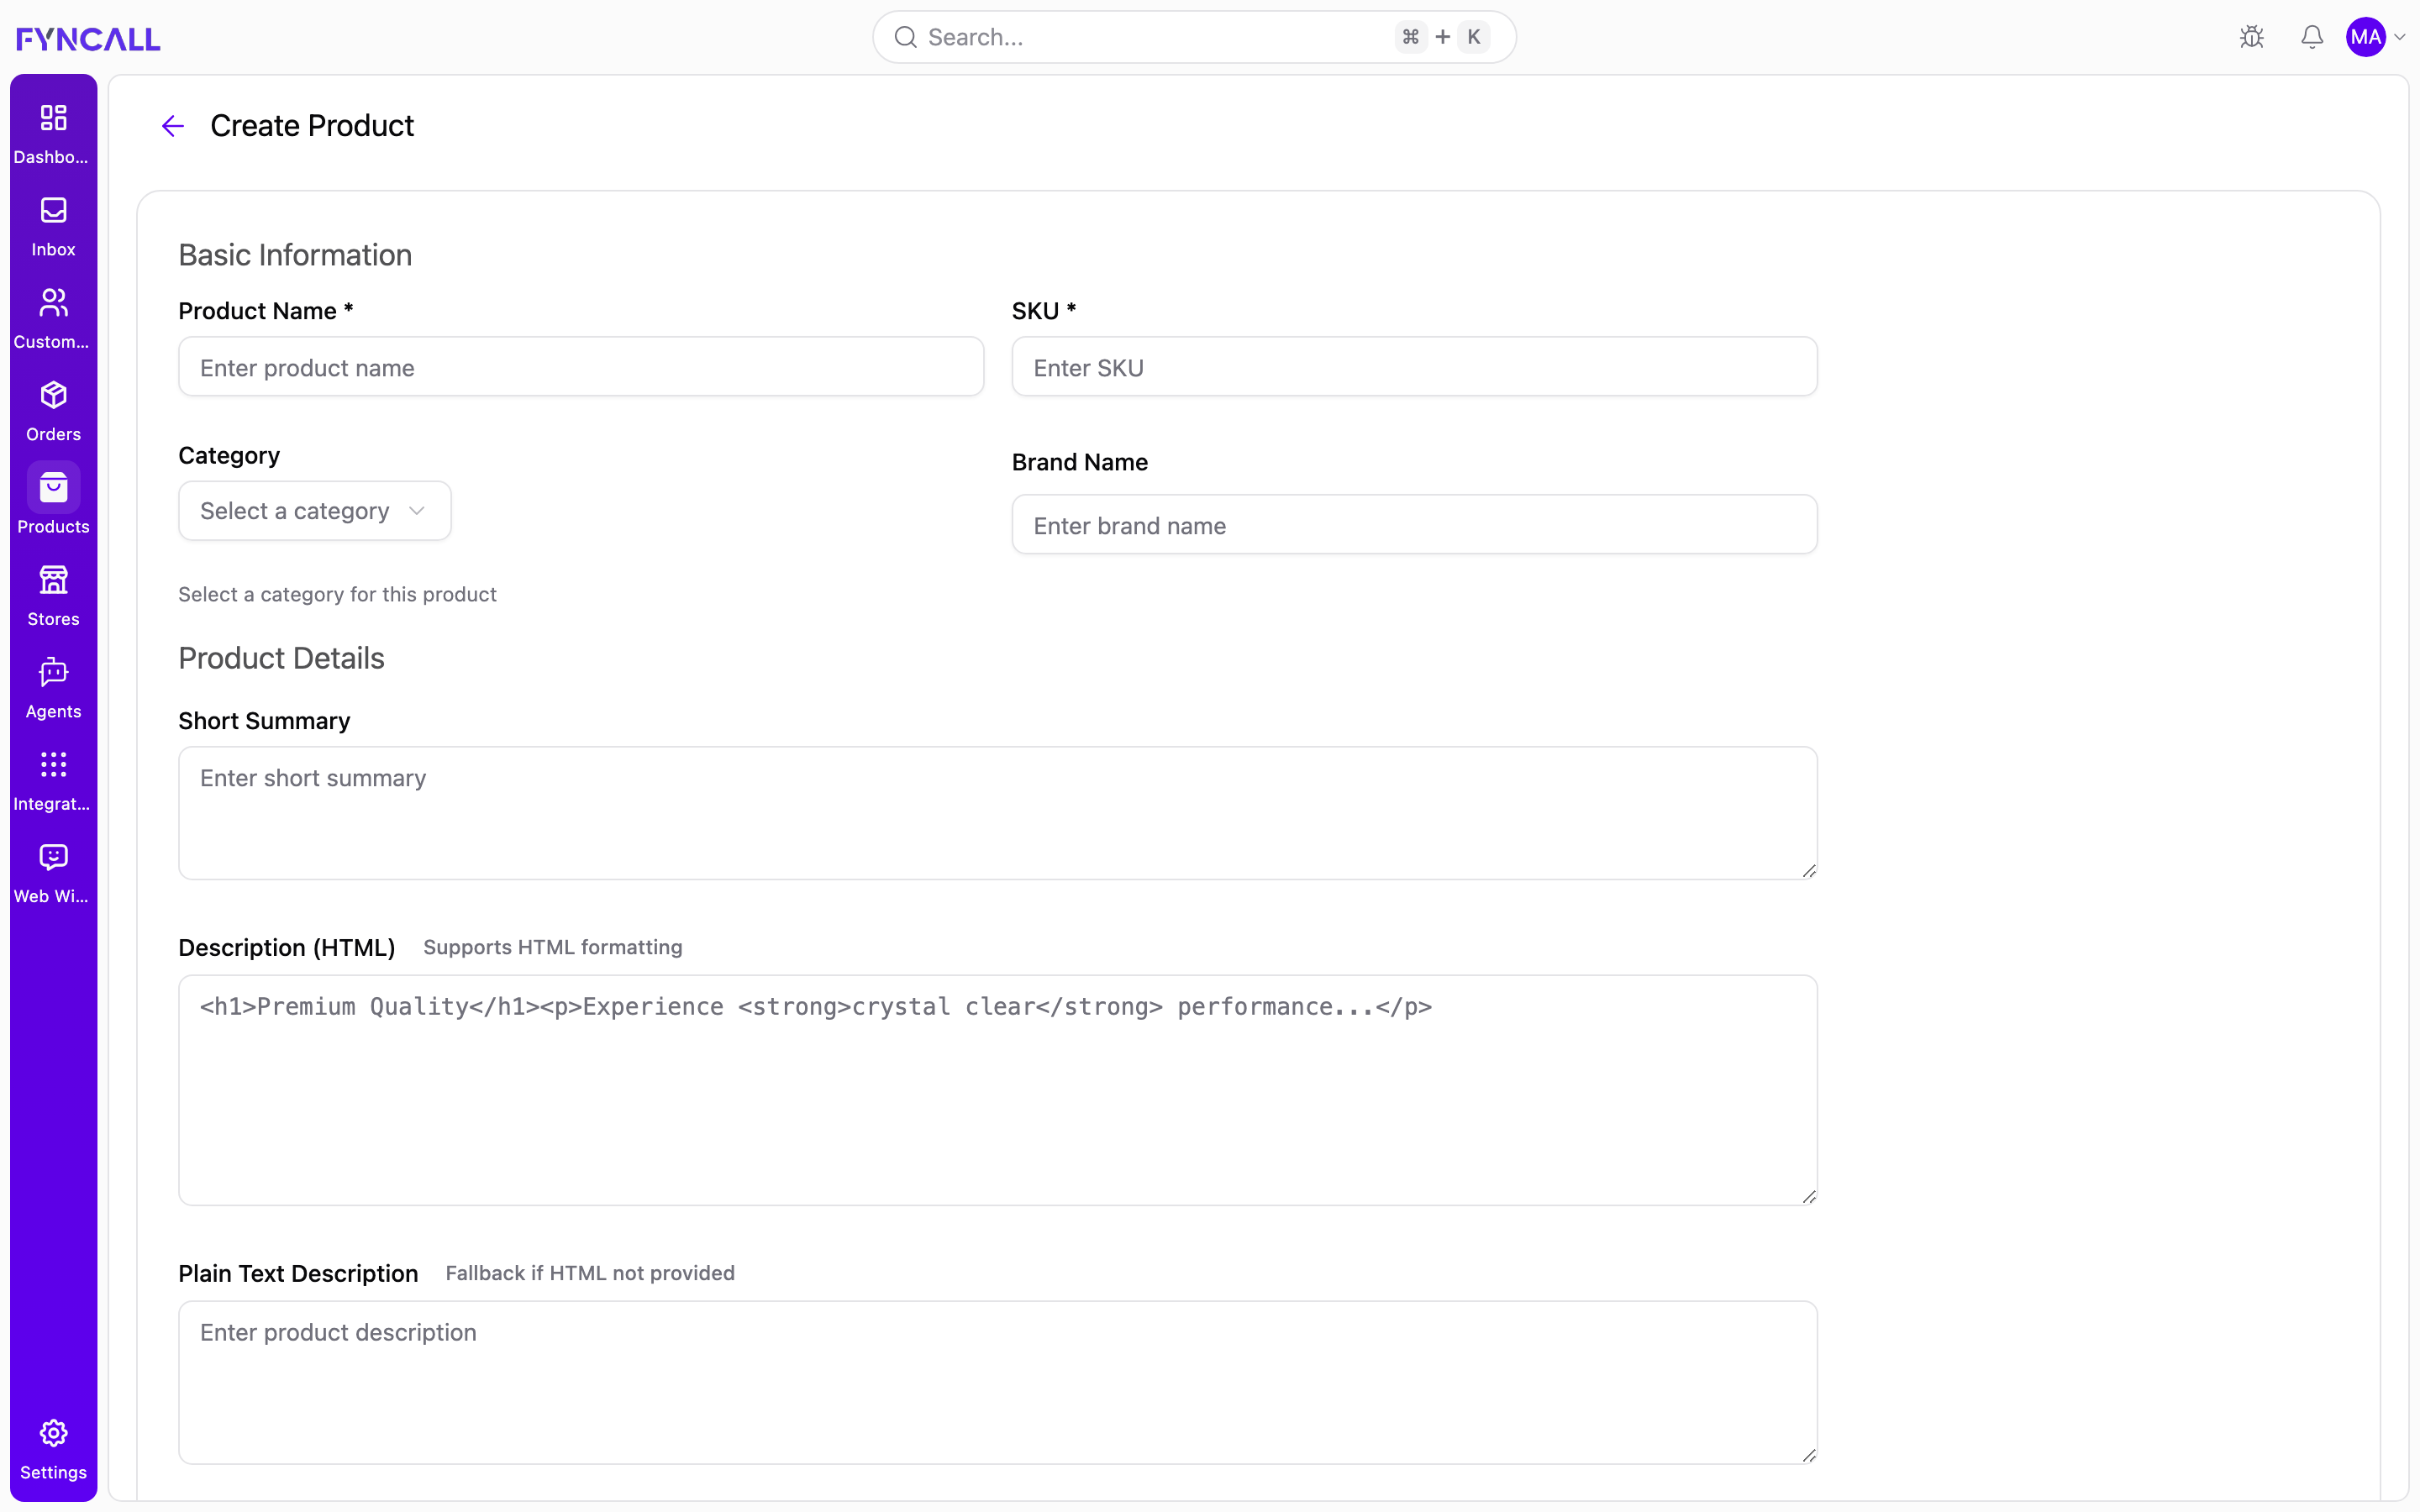
Quick steps:
- On the Products page, select Add Product → Single Product.
- Under Basic Information, enter the Product Name and a unique SKU (both required), and optionally pick a Category and Brand Name.
- Under Product Details, add a Short Summary, an HTML Description, and/or a Plain-text Description.
- Under Pricing & Inventory, set the Price and starting Quantity (both required) and add any Tags.
- Add Product images by uploading files or pasting an image URL (see below).
- (Optional) Fill in SEO Title and SEO Description.
- Leave Product is active checked so the product appears under the default Active filter.
- Select Create Product to save.
The sections below explain each field. Fields marked with * are required.
Basic Information
| Field | Required | Description |
|---|---|---|
| Product Name | Yes | The product's display name. |
| SKU | Yes | A unique stock-keeping unit. |
| Category | No | Choose an existing category, or No category. |
| Brand Name | No | The product's brand. |
Product Details
| Field | Description |
|---|---|
| Short Summary | A brief summary of the product. |
| Description (HTML) | A rich description that supports HTML formatting. |
| Plain-text Description | A plain-text description, used where HTML isn't shown. |
Pricing & Inventory
| Field | Required | Description |
|---|---|---|
| Price | Yes | The selling price. |
| Quantity | Yes | Starting stock quantity. |
| Tags | No | Comma-separated tags for filtering and search. |
Product images
You can attach images in two ways:
- Upload images — drag and drop files onto the upload area, or click to browse. You can add up to 10 images, each up to 5 MB, and image files only. For each uploaded image you can set alt text, reorder it with the up/down buttons, or remove it. The first image acts as the primary image.
- Image URL — alternatively, paste a direct link to an image. A small preview appears when the URL is valid.
SEO Optimization
| Field | Limit | Description |
|---|---|---|
| SEO Title | 70 characters | The title used for search/meta. A live character count is shown. |
| SEO Description | 160 characters | The meta description. A live character count is shown. |
Product Status
The Product is active checkbox controls whether the product is active (and so appears under the default Active filter). It's on by default.
Saving
Click Create Product to save. If you attached uploaded images, they're uploaded first (the button shows Uploading images…), then the product is created (Creating…), and you're returned to the catalog. Cancel discards your input and goes back.
When your store is connected to Shopify, creating a product here can also sync it to your Shopify store.
Bulk uploading products
Choosing Bulk Upload opens the import screen for adding many products at once from a spreadsheet.
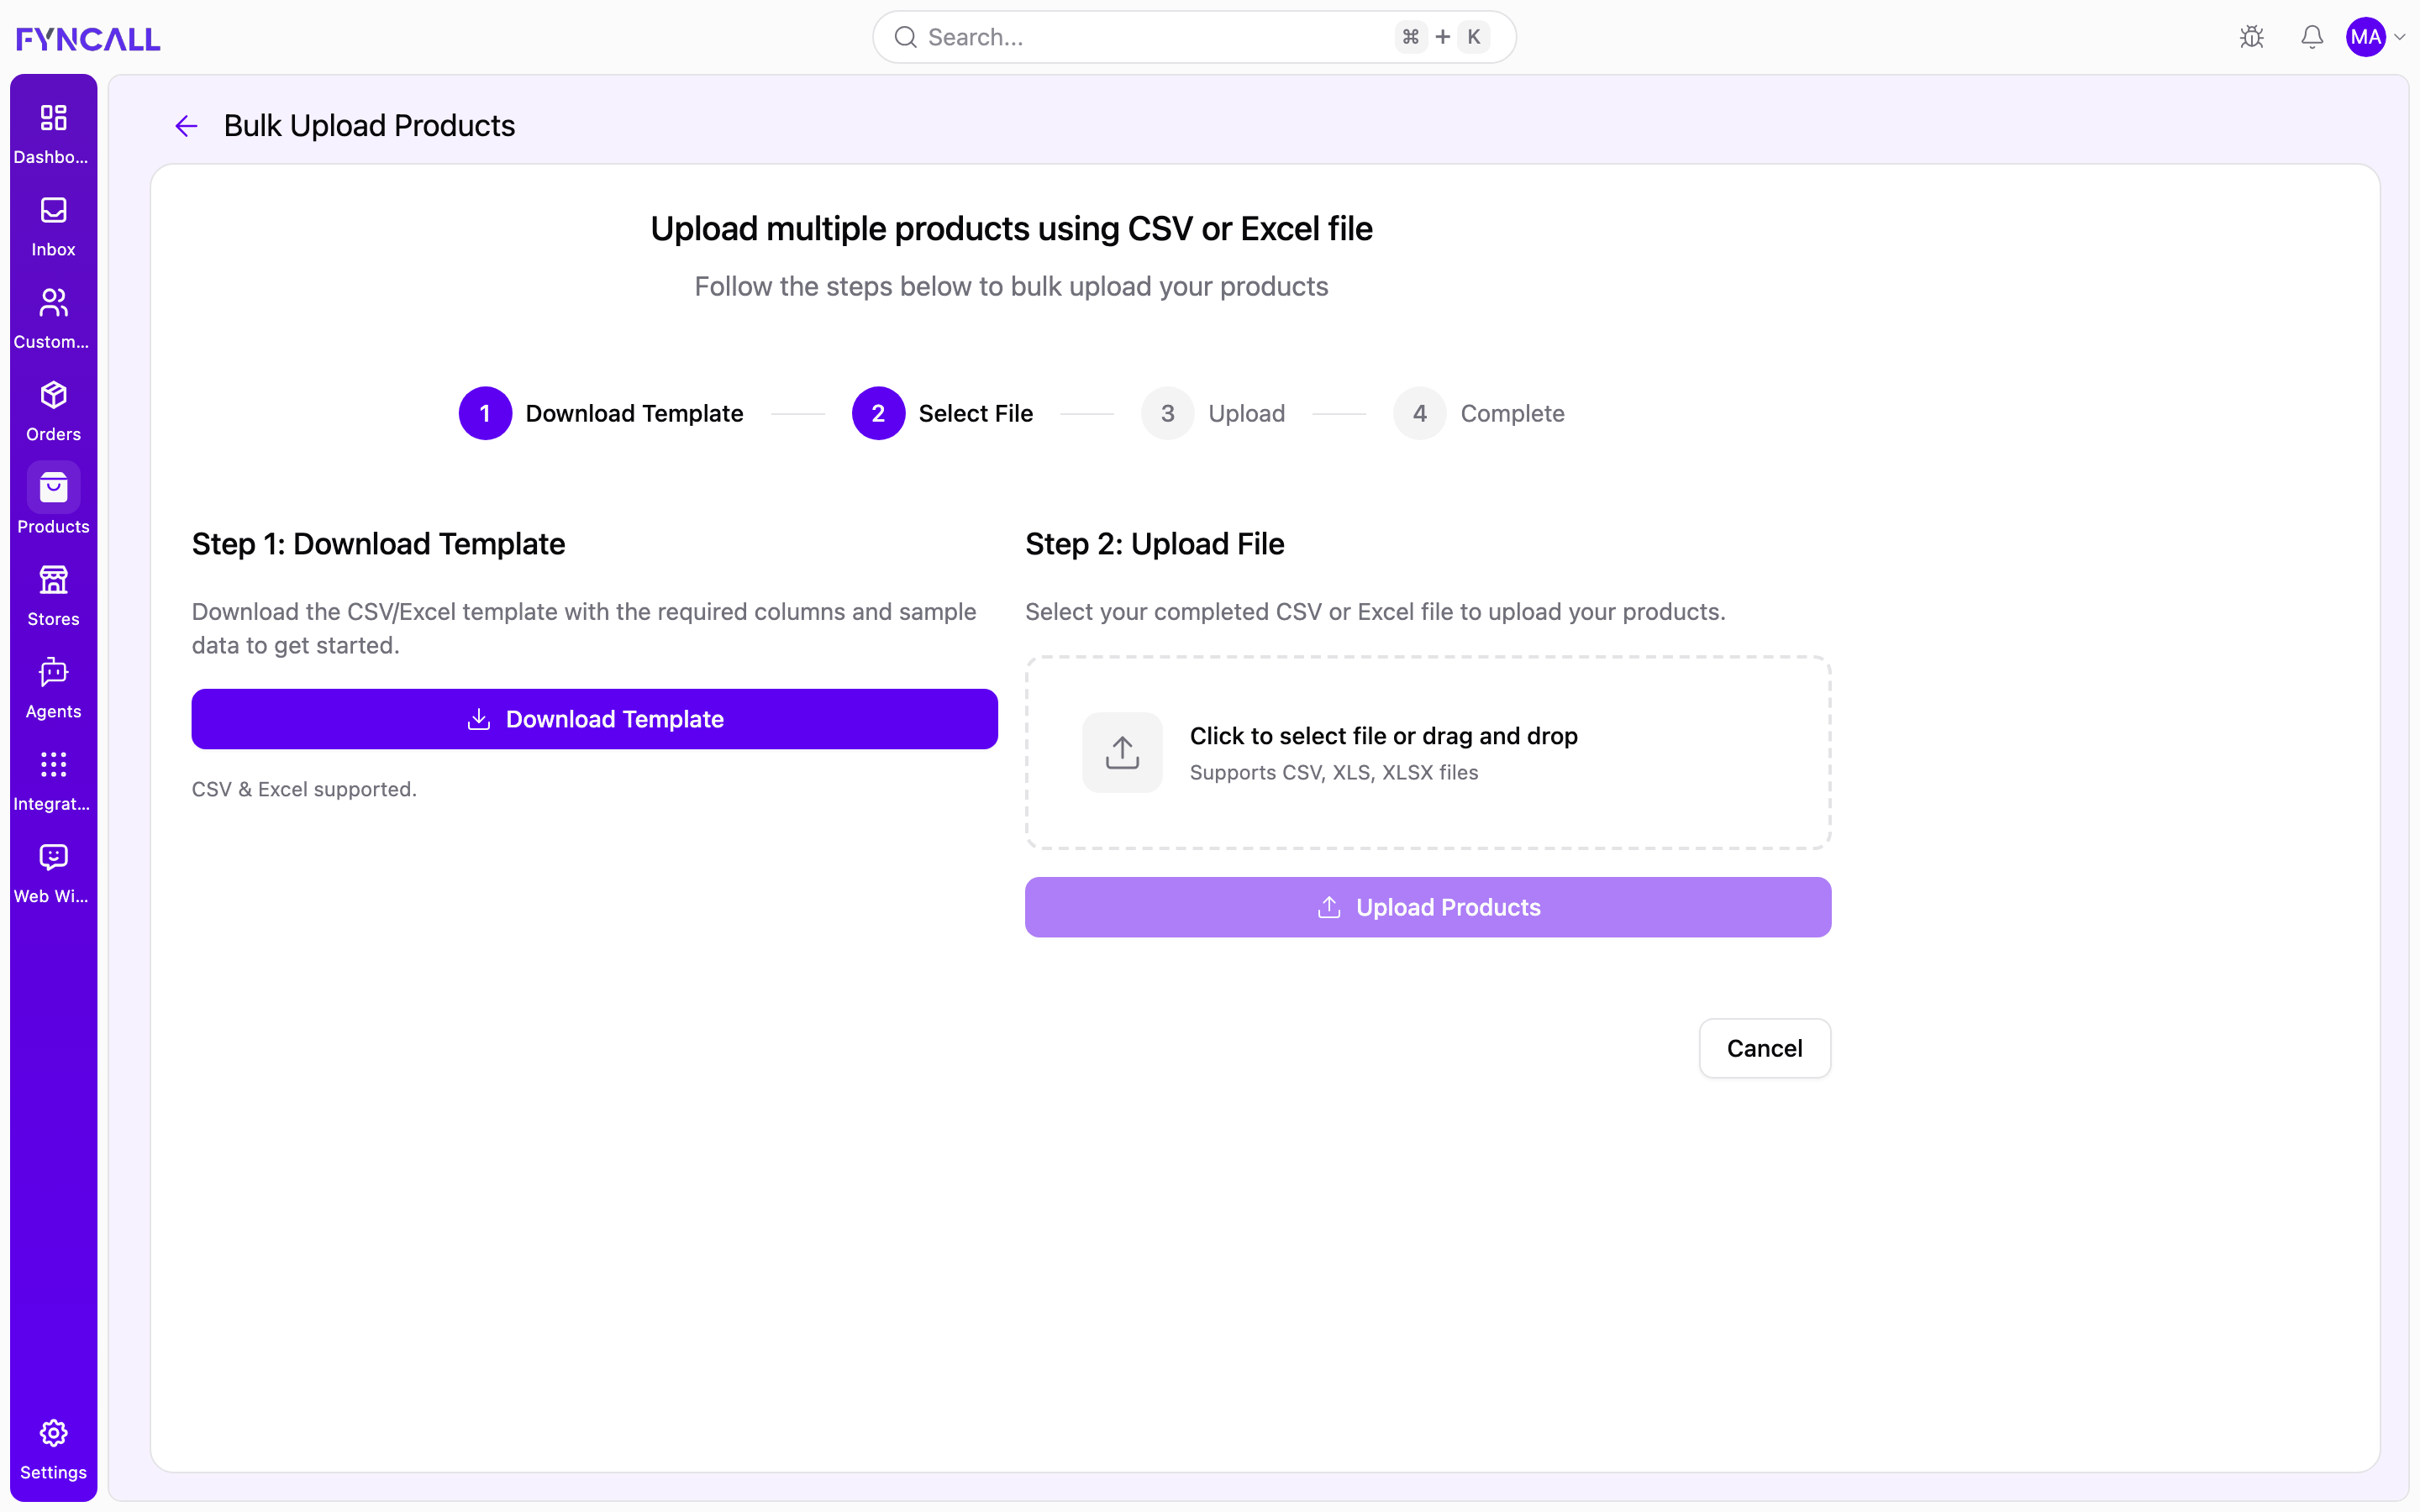
A progress bar across the top tracks the four stages: Download Template → Select File → Upload → Complete. The screen itself is split into two sections — Step 1: Download Template and Step 2: Upload File.
Step 1 — Download the template
- Under Step 1: Download Template, select Download Template to get a starter file with the correct columns ("CSV & Excel supported").
- Open the template and fill in one product per row. Supported file formats are CSV, XLS, and XLSX.
Step 2 — Upload your file
- Under Step 2: Upload File, drag your completed file onto the area marked Click to select file or drag and drop, or click to browse and select it. The selected file name appears once chosen.
- Select Upload Products to import (the button shows Uploading… while it runs).
- When the import finishes you're returned to the catalog, where the new products appear.
Use Cancel at any point to leave without importing.
Make sure SKUs are unique and required columns (name, SKU, price) are filled in before uploading, so every row imports cleanly.